
Learn to craft high-quality custom packaging boxes with simple, step-by-step instructions. Covering design, material selection, printing, and assembly, this guide helps you create standout packaging for products, gifts, or brand promotion.
Why Should You Make Your Own Custom Packaging Box?
Key Advantages
DIY custom packaging strengthens brand identity and cuts long-term costs for small businesses.It provides excellent protection for items during transportation, featuring a professional appearance and clear folding with high-quality printing to build customer trust.
Practical Applications
Versatile for product packaging, gifts, and corporate items, custom boxes protect fragile goods, ensure secure transport, and boost presentation—ideal for retail, e-commerce, and special occasions.
Step 1: Outline Your Packaging Objectives
Clarify Your Needs Up Front
Define your box’s purpose (shipping, display, gifting) to guide design. Shipping needs durable walls; display/gifting prioritizes aesthetics. Clear goals reduce errors and streamline workflow.
Product size, weight, and fragility determine structure. Accurate measurements ensure proper labeling and minimize waste, while audience and brand guidelines shape design choices for recognition.
Step 2: Select the Perfect Box Style
Choose a Style That Fits Your Needs
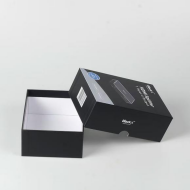
Options include tuck-top (small products), mailer (e-commerce), sleeve (premium unboxing), rigid (high-end items), and two-piece (retail display). Select based on product type and use case.
User-friendliness and ergonomics matter—easy opening and clean lines enhance usability and appearance, reducing frustration for both assembly and use.
Match wall thickness to product needs: thin boards for light items, thick boards for heavy/delicate goods. Reinforced corners add durability for shipping.
Step 3: Pick the Right Materials
Balance Strength, Aesthetics, and Cost
Cardboard (versatile), chipboard (smooth folds), and corrugated sheets (shipping strength) are key. Multi-layer corrugated sheets support stacking during transit.
Material thickness depends on product weight/fragility; density ratings ensure optimal protection. Irregular shapes need flexible materials; flat items work with sturdier boards.
Eco-friendly upgrades (recycled/plant-based materials) appeal to conscious consumers; textured boards add premium tactile appeal.
Step 4: Design Your Box Layout
Plan Folds, Tabs, and Graphics for Success
Create a clear template with fold lines and flap markings—use manual drawings or design software for accuracy, reducing errors and speeding assembly.
Incorporate logos, brand colors, and Clear font. Bright colors attract retail buyers; neutrals suit luxury brands. Avoid clutter to keep branding clear.
Strong lines maintain shape; reinforced edges support shipping pressure. Thoughtful structural planning ensures durability for all box types.
Step 5: Cut Your Box with Precision
Achieve a Perfect Fit with Careful Cutting
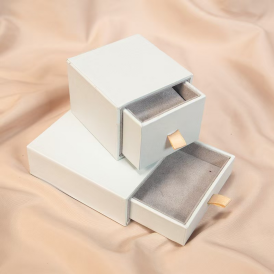
Use a sharp utility knife and ruler for clean cuts. Scoring tools prevent cracking on folds; technical cutters work for complex layouts.
Mark fold lines carefully for sharp corners and alignment. Measured scoring reduces tension and prevents misalignment during assembly.
Double-check measurements to avoid ill-fitting boxes and waste. Dimensional checks ensure consistency across batches.
Step 6: Fold and Assemble Your Box
Fold and Glue for Stability
Fold along scored lines with firm pressure, matching edges for a seamless structure. Precise folding boosts integrity and reduces joint stress.
Apply high-quality glue sparingly; hold panels until bonded. Clean surfaces ensure better adhesion, maintaining a neat appearance.
Assemble the base first, then the sides, flaps, and lid. Avoid misaligned folds and uneven glue—correct early to prevent collapse.
Step 7: Print and Brand Your Box
Create a Professional, Branded Look
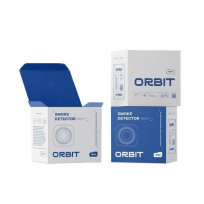
Choose printing methods: digital (short batches/custom), offset (large runs/premium), foil stamping (luxury), embossing. UV coating protects designs.
Align artwork with fold lines; use registration marks and proper bleed settings to avoid misprints. Pre-print checks ensure design integrity.
Add product info and consistent branding. High-resolution graphics and color palettes strengthen recognition and leave a lasting impression.
Step 8: Add Inserts and Protective Elements
Keep Your Products Safe and Secure
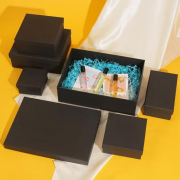
Use foam inserts (fragile items), paper fillers (light goods), or bubble wrap (edges). Custom compartments reduce movement and damage.
Reinforce closures with quality packing tape. Layered dividers organize multiple items, enhancing the unboxing experience.
Well-fitted inserts elevate presentation and protect products, building customer trust by ensuring items arrive intact.
Step 9: Conduct a Thorough Quality Check
Inspect Every Box for Perfection
Test product fit to prevent movement. Technical testing simulates transit conditions, protecting printed surfaces from wear.
Check wall sturdiness, edge alignment, and print clarity. Verify color accuracy and fix smudges or banding marks.
Address minor flaws (misaligned folds, weak joints) and reinforce corners. Ensure each box meets professional standards.
Step 10: Add Creative Customization
Make Your Packaging Stand Out
Add textured layers, metallic foils, or ribbons. Seasonal designs and bold accents boost brand value; technical coatings add protection.
Use brand-aligned colors: vibrant/playful, neutral /luxury, earthy/eco-friendly. Embossed logos add depth and memorability.
Prioritize unboxing—small details (personalized notes, unique inserts) turn first-time buyers into loyal customers.
Step 11: Avoid Common DIY Packaging Mistakes
Perfect and professional result prompts
Avoid incorrect sizing (wastes material, risks damage). Double-check measurements to ensure stability and consistency.
Don’t overcomplicate designs—simple, clean layouts improve usability and reduce costs. Excess layers create bulk and inefficiency.
Use quality materials and adhesives. Weak boards or glue lead to damaged boxes; invest in durability for reliability.
Conclusion: Start Crafting Your Custom Packaging Today
YuCai’s DIY custom packaging combines creativity, functionality, and branding. Follow these steps to create professional boxes that protect products, strengthen your brand, and impress customers—an affordable, flexible solution for any business.
FAQ:
1. What are the good things about making your own custom packaging box?
A: It helps your brand stand out, saves money for small businesses, protects your items well when shipping, looks professional, and makes customers trust you more.
2. What kinds of custom boxes are there, and how to choose one?
A: There are tuck-top (for small products), mailer (for online shopping), sleeve (for nice unboxing), rigid (for expensive items), and two-piece (for store display). Choose based on your product and how you use the box.
3. What materials do you use to make custom boxes, and how to choose their thickness?
A: Common materials are cardboard (easy to use), chipboard (folds smoothly), and corrugated sheets (strong for shipping). Choose thin boards for light items and thick boards for heavy or easy-to-break items.
4. How to cut and put together a custom box correctly?
A: For cutting: Use a sharp knife and a straight tool to cut neatly, mark fold lines carefully, and check measurements twice. For putting together: Fold along the marked lines firmly, use a little good glue, and start with the base, then the sides and the lid.
5. What mistakes should you avoid when making your own custom box?
A: Avoid three mistakes: wrong box size (wastes material and hurts products), too complicated designs (hard to use and costs more), and weak materials or glue (makes boxes easy to break).
Post time: May-25-2026